Our cost for each sofa was under $100.
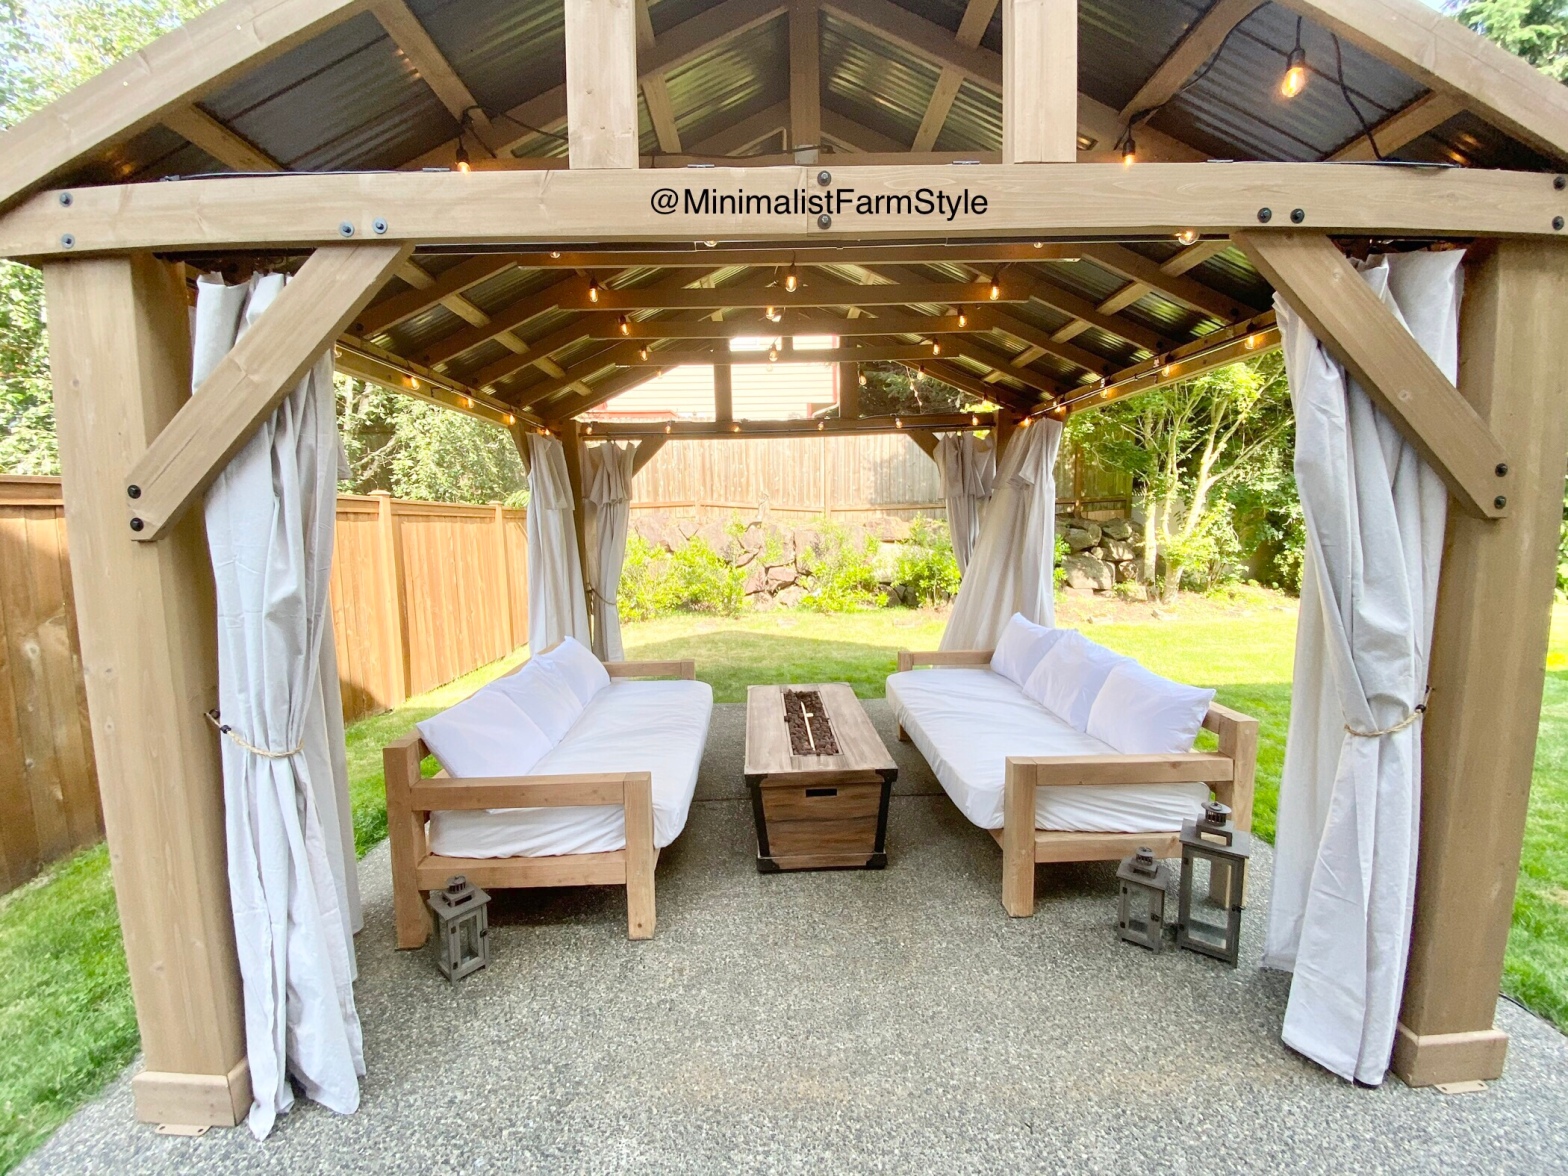
We had just invested in our outdoor pavilion and we needed some outdoor furniture to sit on! We did not want too spend too much, so we decided to DIY two sofas. I was also able to reuse two twin mattress (73 inch in length x 37 inch in width) and six standard pillows from our guest bedroom, which is being turned into an office. Check out the EASY $35 DIY wooden desk tutorial!

This was my first time DIYing furniture, so I definitely came up with a very easy design!”
The 4 in. x 4 in. doug fir and clean look (no visible holes or nails) give it an expensive feel. The fact that the sofa is super sturdy is a bonus.
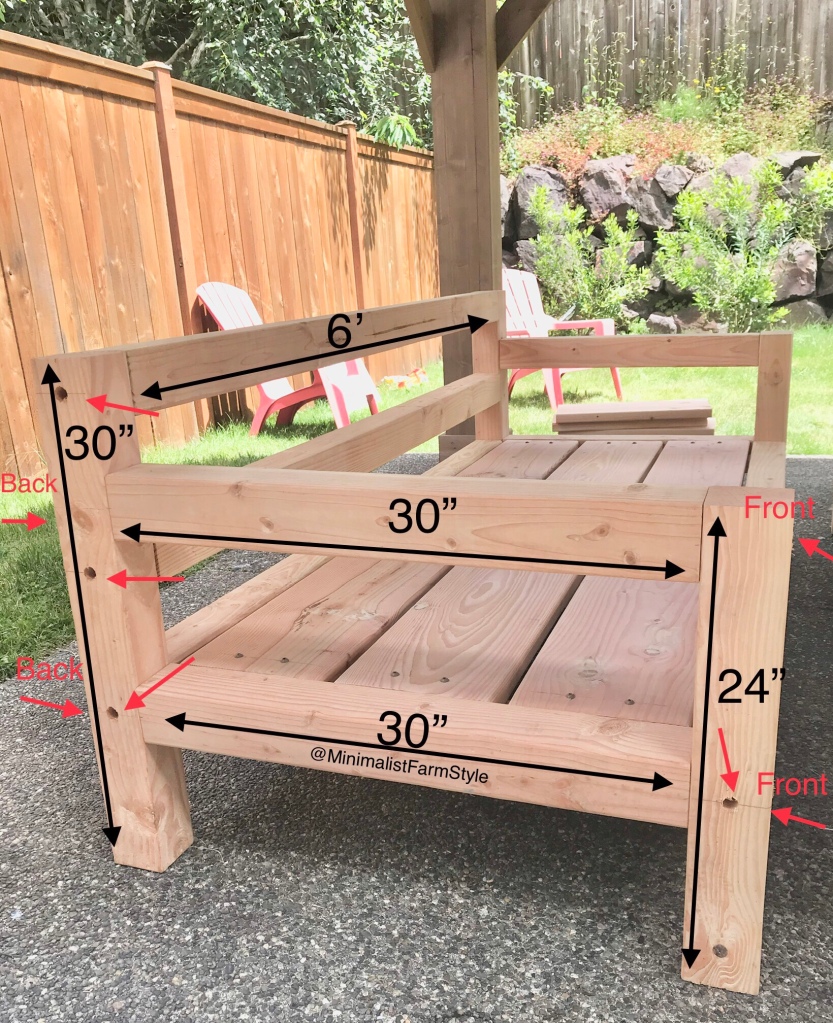
Black arrows show cut dimensions of 4 in. x 4 in. X 8 ft. Doug Firs.
Dimensions
This sofa can be easily modified in length, width or height.
The dimensions for this sofa are modern as it sits low to the ground and has a squarish appearance.
The arm height is 24 inches and the back of the sofa is 30 inches in height. The total available depth from front to back is 37 inches, which allows for our mattress to fit in the available seat space. The complete length of the sofa is 79 inches and allows for a 72 inch (6 feet) mattress to fit — our 73 inch mattress fits perfectly.
- Sofa seat height: 12 inches
- Sofa seat depth: 34 inches
- Sofa seat length: 6 feet.
- Sofa back height: 30 inches
Materials used for 1 sofa:
- Six 4 in. x 4 in. X 8 ft. Doug Fir
- Three 2 in. X 10 in. X 8 ft. Doug Fir
- Two 2 in. x 4 in. X 8 ft.
- One 3/4 in. x 48 in. Hardwood Round Dowel
- Stainable Wood Filler
- One case (50 quantity) of #12 x 5-5/8” Screws
- 2-1/2” 64mm screws design for use with the Kreg Jig HD
- 80 and 220 Discs
- Pre-Stain Wood Conditioner (optional)
- Stain
- Sealer
Tools Used:
- Miter Saw (or have your local hardware store cut the wood for you)
- Pull Saw (for cutting dowel)
- Orbital Sander
- Putty knife
- 3/4 inch Spade Bit in Kit
- Kreg Jig HD (allows for bigger screws)
GET THE LOOK:
56″ Light Weight Concrete Fire Pit – 50,000 BTU
Pre-Stained Premium Cedar Wood & Aluminum 14 x 12 Outdoor Pavilion Gazebo

STEPS:
1) Cut 4 x 4 Doug Fir wood (if not cut at hardware store). Each sofa arm requires three 30 inch cuts and one 24 inch cut; therefore, each sofa needs six 30 inch cuts and two 24 inch cuts. To complete the sofa, you will need four 72 inch cuts for each sofa. After cutting, position pieces for the arms and back on floor to assure you have all the cuts necessary. I definitely needed to do this part to help me visualize where I needed to place the screws.

2) Made 3/4 inch holes on all 4 in. x 4 in. Doug Fir arm pieces. The arm pieces are the only ones that will require these. Each 24 inch piece will require two holes at 10 inches from the bottom that connect inside and another hole (approximately 1 inch in depth) 22 inches from the floor. See picture below.

Two connecting holes were also made on the backside at 10 inches from the floor. Another two holes (approximately 1 inch in depth) were made at 18.5 inches and 22 inches from the floor. The top backside hole (approximately 1 inch in depth) was made at 28 inches from the floor. See picture below.

3) Sanded wood with 80 grit disc to remove black ink stamps and rough breaks from the wood.

4) Used wood glue and #12 x 5-5/8” screws to connect all 4 in. x 4 in. Doug Fir pieces.
5) Cut 2 in. x 4 in. wood (if not cut at hardware store). You will need four 30 inch pieces. We placed one on each end of the sofa seat and two spread apart in the center of the seat.

6) Made two Jig holes on each side of the four 2 in. x 4 in. wood pieces. Then, used 2-1/2” 64mm screws designed for use with the Kreg Jig HD to connect the 2 in. X 4 in. wood to the 4 in. x 4 in. Doug Fir.
7) Cut the 2 in. x 10 in. X 8 ft. boards to 72 inches in length. You will need 3 in total. Sand these with a 80 grit disc. You can space them as you would like on the seat. I kept the front and back spacing smaller than the middle spacing as noted in the picture above.
8) Used 2-1/2” 64mm screws designed for use with the Kreg Jig HD to set the 2 x 10 boards in place to complete the seating area.

9) Fill each 3/4 inch hole with the 3/4 inch round dowel. Use a pull saw to cut off remaining wood.
10) Fill any remaining small holes with Stainable Wood Filler. Then, sand entire sofa with a 220 grit disc, focusing on the cushion and arm rest area.
11) Stain and seal. It is recommended a pre-stain wood conditioner be used prior to staining to allow for a more even finish. Unfortunately, I did not like my initial stain as it turned out too dark. I had to resand the entire sofa! I ended up using a water-based Varathane Java Bean stain I had on hand, which I watered down by using equal parts water and stain. I liked the 50/50 combination.I also added about a spoonful of oil-based Varathane Weathered Oak to the cup with the watered down Java Stain before dipping my rag in it for each stain application. I liked the look when I initially did it and wanted to have the same effect throughout the piece. For more information on staining and protecting wood, click here.
Accommodating Standard Cushion Seats
If you want smaller standard outdoor cushions to fit, you simply decrease the seating area to accommodate.
For example, to accommodate an outdoor cushion that is 23 inches wide x 26 inches deep, adjust the seat length of the sofa to 69 inches and the seat depth to 26 inches in order to allow for three cushions. If you only want to fit two cushions, then decrease the seat length to 46 inches and keep the seat depth at 26 inches. Or if you want a single chair instead, decrease the seat length to 23 inches and maintain the seat depth at 26 inches.
No Cushions Needed
Initially I wanted to use 2 in. X 4 in. boards to cover the entire seat area. I ended up going up in size and used the 2 in. X 10 in. boards instead. In the end, I think the bigger 2 in. X 10 in. boards complemented the 4 in. X 4 in. better! I like the look of the big boards so much that I could see myself skipping the cushions, but since I already have the twin bed mattresses, I did end up using them!
Notes
I found sanding to be the most time consuming step and staining to be the most difficult step.
As I mentioned above, I did not like my initial stain, so take a few minutes to review the Staining Wood article to achieve the perfect stain.
In the end, these sofas are comfortable and stylish! I hope this design is simple enough for other beginners and beautiful enough for those more experienced!
Note: This post contains affiliate links, at no added cost to you. As an affiliate partner of various brands, including as an Amazon Associate, I earn commission on qualifying purchases. All content is for informational and entertainment purposes. For more information, refer to the Disclaimer and Privacy page at http://www.MinimalistFarmStyle.com.


What is the use of the dowels? It doesn’t look like they are connecting any pieces of wood together.
LikeLike
You are right! They are for aesthetic purpose only.
LikeLike